Do you get annoyed by that constant dripping kitchen faucet? And no matter how much cleaning you do, always get minerals to build upon the faucet and the sink? Follow our easy step-by-step DIY tutorial on how to fix a leaky faucet in your home. A kitchen faucet that drips not only drives you crazy but also makes you spend more on your water bill. According to the U.S. Geological Survey drip calculator if a kitchen faucet has only 1 drip per minute will waste 0.3 gallons per day. That doesn’t sound like much, but in a year you’ll waste 104 gallons of water.

What Causes a Dripping Kitchen Faucet?
The are many reasons why the faucet drips. These are the most common issues you can encounter with a leaky faucet.
Damaged Cartridge
Most faucets with one or two handles face this issue with the damaged cartridge over time. The faucet cartridge is a valve that controls the water flow between the supply lines and the spout. When the spout is constantly dripping it’s a sign of a damaged cartridge.
Worn Out Washers
Frequent leaks can occur when washers are broken. Washers are located on the valve seat. Over time due to friction the washers worn out. When this happens the faucet leaks. A common mistake is when inappropriate size washers are installed or the installation wasn’t made properly. It will lead to a dripping faucet.
Seat Valve Corrosion
The valve seat is the main connection between the faucet spout and the compression mechanism. Minerals buildup that leads to seat valve corrosion. You will see signs of leakage around the spout area. A good cleaning of the seat valve should solve the leakage.
Broken O-Rings
O rings can be found inside the faucet. They are like little washers made o rubber. When they are worn out or get loose the faucet start to leak. The most common sign when O Rings get broken is when the faucet’s handle drips.
Water Pressure
High plumbing water pressure can lead to faucet dripping.If your faucet is leaking only on specific times of the day. For exemple during night time or when other fixtures in your home aren’t used. Means that your water pressure is to high and can lead to serious leakage and damage to your fixtures.
Damaged or Old Plumbing
When the plumbing is old and rusty,cracks or losing fitings are the major cause of a leaking faucet. If you notice a steady drip from the faucet or sorrounding area.You’ll have to check under the sink for damaged plumbing or loose fitings.
Types of Faucets
Faucets have different designs both aesthetically and functionally.
Knowing the type of faucet will help you disansamble all the parts , fix it and put it back toghther.

Ball Faucet
A ball faucet is a common fixture in many kitchen sinks and was the first faucet without a washer system. You will recognize it by the single handle that moves around a ball-shaped cap. This type of faucet uses a ball made of metal or plastic that moves inside the faucet. The ball has built-in special gaps with O rings and rubber seals. When the handle turns this ball it allows water to flow depending on the pressure and temperature chosen. Ball faucets are less reliable than cartridge or disk faucets due to many manufacturing parts. When rubber seals fail, ball faucets have the tendency to leak.
Compression Faucet
If you aren’t too young you have probably seen this type of faucet. They have been a part of plumbing history from the beginning. You can find them in old houses or in updated versions for those who are attached to them even today. They are cheap, reliable but prone to drips. Compression washer faucets come with two different handles for cold and hot water. By tightening the handle a washer presses against the valve seat to stop the water flow. Over time, the washer wears out and leaks occur.
Cartridge Faucet
The cartridge faucet was invented many years ago by Al Moens and can be found on the best Moen kitchen faucets. Cartridge faucets nowadays have become more complicated and technologically advanced than early models but respect the same basic principle. The cartridge consists of a small cylindrical body with a short thick stem protruding from the top. Strategically placed holes allow passing water through the cartridge from water inlets to the spout just by turning the handle. Rubber gaskets on the valve seats and O rings surrounding the cartridge may fail over time. When this happens the faucet drips.
Ceramic Disk Faucet
The ceramic disk faucets are the latest innovation in the plumbing industry. The principle of operation is simple and efficient. Basically, there are two ceramic discs with holes through them one disc is fixed while the other moves with the faucet handle. When both are aligned they allow water to pass through. When their holes are no more in alignment the water flow stops. Theoretically, a ceramic disk faucet will last for a lifetime. But it all depends on the quality of the faucet and the hardness of the water.
Tools and Materials Required


How to Repair a Leaky
Kitchen Faucet?
Repairing a leaky kitchen faucet does not require special skills, but you have to know what type of faucet you are dealing with. Each type of faucet has different design, different parts and you have to follow a specific repair method. Fortunately, with this step-by-step guide you will know how to repair each type of faucet.
How to Fix a Dripping Ball Faucet?

Step-by-step Guide:
1. Shut the water off
Reach out under the sink and find the shut-off valves to turn the water off. Usually, they are located under the sink. In some cases where you can’t find the valves, you’ll have to find the main valve that controls the water supply for your whole house. When all the valves are off turn on the faucet to assure that everything is off and all the water leaked from the plumbing.
2. Remove the Faucet’s Handle
On the faucet’s handle, you’ll see a small cap that shows hot and cold water or the company logo. You can pop out this cap using a flat screwdriver. Underneath there is a screw that tights in place the handle. Using the screwdriver loosen the screw to reveal the faucet top cap.
3. Collar and Cap Removal
Once the handle was removed you’ll see the collar and the cap that holds in place the ball assembly. Using a wrench and a piece of cloth or rubber to not damage the faucet finish you can remove them.
4. Pull-out the Cam
Using pliers unscrew and lift gently the cam. It looks like a white plastic disk with a hole in the middle.
5. Lift Up the Ball Assembly
Once the cap is removed you’ll notice the ball assembly. Usually, the ball is made of brass or plastic with a lever attached to it and special holes through which water flows. Inspect the ball for signs of mineral build-up or wear. If the ball has been damaged it’s time for a replacement.
6. Seals and Springs Removal.
Underneath the ball assembly, you will find two rubber seals with special springs attached. Using a small flat screwdriver remove the seals located on the bottom of the faucet’s body.
7. Replace the Seals and Springs with New Ones
Before replacing the new repair kit for the ball faucet inspect the insides for damages or mineral build-up. You can use a special penetrant or vinegar to clean the faucet valve seat. Now you can put back the new seals and springs. It’s easy using a small flat screwdriver or a pencil. Make sure to fit them in place.
8. Install the New Ball and Cam
In case of a damaged ball or cam, you can also replace them. They are cheap and usually come all together in a repairing kit with seals and springs. If not just put back all the ball assembly and be careful to align the ball holes with seals.
9. Reassemble the Faucet
Once everything is mounted correctly just screw the cap on the faucet’s body making sure not to overtighten. When the cap is too tight the ball inside the faucet is stiff and leaks can occur.
10. Test the Faucet
If you’ve gotten this far, all you have to do is mount the handle. Turn on the valves from the water supply and test the faucet. https://www.youtube.com/watch?v=eog9Xa2fD6c
Using the wrench directly on the faucet’s finish will damage it.Always use a piece of cloth or rubber to protect it.
How to Fix a Dripping Compression Faucet?

Step-by-step Guide:
1. Remove the Handles
First, make sure to turn the water off to avoid accidental flooding. Next, remove the handle using an Allen key or a Philips screwdriver. Some brands have special caps to cover the screws. You can use a flat screwdriver or a knife blade to remove the screw cover. Be careful with sharp objects as they can cause injuries
2. Remove the Stem
Using a wrench or pliers you’ll have to unscrew the nut that’s retaining the stem. In some cases, there’s also a cover on top of the valve ‘stem assembly. Make sure to remove it first before reaching the stems nut.
3. Check the Stem for Wear and Damage
Inspect the stem washer and O-ring for tear and damage. A leaky compression faucet is often caused by a faulty seat washer.
4. Replace the Stem Washer or O-ring
Remove the screw securing the washer with a Philips screwdriver. Liftoff the old washer and replace it with a new one. Always compare the size and shape with the old one to ensure a tight fit.
5. Assemble the Faucet
After replacing the washer and O-rings reassemble the stem back tightening the nut. Attache the handle and put back the decorative caps. If all parts are in place and properly assembled turn the water supply valve on and test the faucet for leaks.https://www.youtube.com/watch?v=irH41yaAFDc
First, check the loose nut. A faucet may leak if the retaining nut under the handle is loosened. So before disassembling the whole faucet first check the retaining nut.
If the stem assembly has no washer or damaged one you can always use plumbers putty. It makes a perfect seal and stops any leak.
How to Fix a Dripping Cartridge Faucet?

Step-by-step Guide:
1. Handle Removal Before disassembling the faucet turn the water supply off. Remove the cap covering the handle screw. With an Allen key or Philips screwdriver remove the screw that holds in place the handle.
2. Unscrew the Retaining Nut
Once you set aside the handle you’ll notice the retaining nut. On many brands, there’s also a decorative cover or a plastic ring. First, remove the cover, and then with the help of pliers or a wrench gently unscrew the retaining nut.
3. Remove the Cartridge
It’s time to remove the faucet’s cartridge. With the help of pliers lift the cartridge by its stem. You probably need to wiggle a bit because minerals build-up can make removal more difficult. At this step is a good idea to clean the inside of the faucet. You can use a special rust penetrant or vinegar.
4. Insert the New Faucet Cartridge
Slide the new cartridge down until seats firmly on the bottom of the faucet. Make sure to choose the right cartridge that fits with your faucet. Some brands use a special cartridge that applies only to their faucets. Using the wrench tighten the retaining nut in place. 5. Install the Handle Once the cartridge is in its place put back the handle. Use the Allen key or the screwdriver to tighten the screw.
6. Test the Faucet
Open the supply lines and turn the faucet on. At this point, your faucet should work properly without leaks.https://www.youtube.com/watch?v=PEfhPIeOG74
Note that some brands use a hex screw integrated into the valve assembly. Use the appropriate Allen key to remove the cartridge.
How to Fix a Dripping Ceramic Disk Faucet?

Step-by-step Guide:
1. Remove the Cap Covering the Handle Screw
Find out where the cap is located. Usually, you can find it in the front or the rear of the faucet. Using a utility knife or a flat screwdriver pop out the cap covering the screw.
2. Remove the Handle
Using an Allen key or a Philips screwdriver remove the screw and lift the handle. Put the handle aside and take care not to lose the screw.
3. Lift off the Decorative Cap
Once the handle was removed you’ll notice a decorative cover. You can lift it or unscrew it with your hand. Under the cover, you’ll see the ceramic cartridge.
4. Loosen the Ceramic Disk Cartridge
The ceramic disk cartridge is retained by a special nut. Using a wrench or a set of pliers you can unscrew the nut and loosen the ceramic cartridge.
5. Remove the Ceramic Disk Cartridge
Now you can lift the ceramic cartridge. Inspect the cartridge for wear and minerals build-up. Either you can replace the seals and O-rings or replace the entire ceramic cartridge if it is broken.
6. Clean or Replace Ceramic Disk Cartridge
Using a brush with some vinegar clean the cartridge and the inside of the faucet removing all the mineral buildup. Renew all the seals on the ceramic cartridge and the O-ring inside the faucet body. If the cartridge is worn out just replace it with a new one.
7. Reinsert the Ceramic Cartridge
Slide in the new cartridge and tighten the retaining nut using a wrench or pliers. When done put back the decorative cover.
8. Reassemble the Handle
You’re almost done! Put back the handle tighten the screw and put back the covering cap. You can switch on the water supplies and test the faucet if it still dripping. https://www.youtube.com/watch?v=KVuaELhKHdQ
Using plumber’s grease on the valve seats and O-rings will extend the life of the faucet.
Best Tips to Mantain Your Faucet without Dripping.
You probably didn’t think about maintaining your faucet until you have an issue with it or starts to drip. That’s why is important on keeping your kitchen and bathroom faucets in good condition. Not only saves you time, trouble but also less money out of your pocket. Here are a few simple tips on keeping your faucets in good condition.
1. Regular Maintenance
Daily basis maintenance is suitable for any type of faucet. Using a damp cloth and a mild cleanser is all you need to maintain your faucet.When using cleansers always keep in mind the faucets finish. Always read the labels on the cleaning products to ensure that are suitable for delicate surfaces and compatible with your faucet’s finish. A mild option for your faucet’s daily maintenance is also a window cleaner.
2. Clean and Remove Minerals Buildup
In many cases even with daily maintenance minerals buildup on the faucet’s body. Especially if you live in an area with hard water. The lime buildup is hard to remove. Often a mildly abrasive scrub or some vinegar will solve the issue. But when you are dealing with stubborn deposits you will need to use specialized cleaners. Once again, take care when using a powerful cleaner on the faucet’s finish.
3. Remove and Clean the Aerator
The purpose of an aerator is to mix water and air to ensure a smooth flow and reduce water usage. An aerator has a housing, rubber or a screen insert, and a gasket. We often ignore the importance of aerators when we are dealing with faucet maintenance. But experts in the industry do recommend cleaning the aerator at least once a year. When cleaning the aerator all you have to do is remove it. Using your hand or pliers unscrew the aerator. Flush with water all the parts and clean the screen with an old toothbrush. You can always use some vinegar to soak all the parts when minerals are hard to remove. When everything is clean just reinstall the aerator. If the aerator is clogged and rusty, it is best to replace it with a new one. They are not expensive and save you a lot of trouble.
4. Faucets Parts and Repair
Although regular maintenance and aerator cleaning should maintain your faucet without drips. There are a few chances, that small parts of your faucet break down. These small parts are prone to wear and tear and can be damaged resulting in a faucet that leaks.Small springs, seats, seals, and O-rings can be damaged over time and need replacement. Fortunately, you can find very easy repair kits suitable for any kind of faucet.
5. Don’t Forget the Warranty
When buying a faucet most homeowners pay attention to looks and features. While these are important factors don’t overlook the faucet’s warranty. Many brands deliver their faucet with limited or lifetime warranty. Take a look at your faucet’s warranty to know what defects it covers. It will save you money on replacement parts that are covered by a warranty. The same goes for damaged finishes and other issues with your faucet. Soo next time when you are buying a new faucet don’t overlook its warranty. It will save you money and a lot of headaches.
Leaky and dripping faucet: should you repair or replace it?
While most manufacturers make faucets to last for years, there’s always a chance that things go wrong. So when your sink faucet starts leaking, dripping, or shows any signs of wear and tear what should you do? Here is a little guide wherever you should repair yourself, call a professional, or replace your old faucet.
When to Repair Your Kitchen Faucet?
Simple repairs of your faucet involve less money spent than replacing it with a new one. Here are a few tips to decide if repairing your old faucet worth it:
Faucet Type. There are different types of faucets on the market. Each one with its own mode of operation and distinct parts that can damage over time. Fortunately, you’ll find ready-made repair kits for every type of faucet.
- Dripping Faucet. A leaky faucet in most cases can be fixed easily. Sometimes it only needs to be tightened a little a bit. But in most cases, it could be worn-out seals or some O-rings inside the faucet. Changing them will fix the dripping issue.
- Squeaky Faucet. If your faucet starts to squeak doesn’t mean it needs a replacement. Removing the squeaking parts and greasing them will make that annoying noise go away.
When You Have to Replace the Kitchen Faucet?
Although faucets are made to serve you for a long time they won’t last forever. After many years of use eventually, they will break down. As a general rule, the older is the faucet there’s likely more trouble with it. Replacing every fixture in your house will cost you a fortune. Let’s what are major signs that your faucet needs a replacement:
- An Old Faucet. In general, the lifespan of a faucet is about 15 to 20 years. If your faucet is too old and unreliable it’s time to replace it.
- Frequent Repairs. Is a common sign that your faucet needs a replacement as soon as possible. Few repairs on your faucet will be way cheaper than replacing it. But when repairs add up will cost you more than buying a new one.
- Water-saving. Older faucets do not comply with the new standards and can waste a lot of water which will add a higher cost to your water bill. An older faucet will be running between 3-6 gallons of water per minute instead of newer ones with just 1.8 GMP.
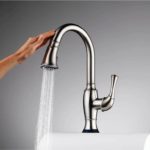
- Hygiene. If you are concerned about your health maybe it’s time to change your old faucet. Germs and bacteria can build up on the faucet’s body. Using a touchless kitchen faucet reduces the spread of diseases. Many homeowners embrace the new touchless technology found in kitchen and bathroom faucets.

Finally, the Faucet isn’t Dripping Anymore
Fixing a dripping faucet is cheap, quick, and easy. Now you how to fix a leaky faucet. All you have to do is get your hands a little bit dirty and with our step-by-step guide, you won’t get it wrong. Many homeowners can fix or repair their leaky faucets. Plumbers can step in when things get complicated.So before calling a plumber you’ll have to compare the cost of its service against the cost of buying a new faucet.