When you feel your water pressure gets low, the culprit could be your faucet aerator. But how do you remove it? In most cases, you are dealing with a stuck aerator. So, follow our tips and get your faucet aerator removed.https://touchlessfaucets.info/wp-content/uploads/2022/10/How-to-remove-and-clean-a-faucet-aerator.mp4
There are quite a few steps and instructions, but they are simple enough that they can be carried out without any experience. Start with these tips and see what works for your specific problem!
What is a faucet aerator?
A faucet aerator is a small, round device which can be connected to your sink faucet to help reduce the amount of water that comes out of it. They work by creating a gap between the water stream and the surface of the sink, which allows it to flow more slowly through the faucet without creating suds or splashing. The faucet aerator has small holes around its circumference, which are designed to distribute water evenly by allowing air to pass through them. The holes allow water to flow through at different rates depending on the pressure of the water source, which makes it easier for you to control how much water comes out of faucets spout. A faucet aerator can also improve the quality of your drinking water, by reducing the amount of sediment that can accumulate in your pipes. To ensure a constant flow of drinking water, it’s important to clean your faucet aerator regularly.
Related Article: How does a touchless faucet work? – All you need to know
How to remove faucet aerator without tool?
Generally, the faucet aerator can be removed by unscrewing it with your hand. Using your fingers unscrew the aerator counterclockwise. For extra grip, you can use a dump cloth or rubber gloves. If you want to know how to remove an aerator without a tool, follow these steps: 1. Turn off the water using the faucet handle.2. For a more secure grip, be sure to wipe your hands and the faucet spout. 3. Rotate anticlockwise the aerator to loosen it. 4. Remove the aerator and clean it with warm water and mild detergent.5. Once all is done you can screw it back. If the aerator is clogged or rusted maybe it’s time to change it to a new one. When you removed the faucet aerator, you should replace it with a new one since they are extremely cheap. However, if you were not successful in removing it using your bare hands, it’s time to move on to the next step.
Related Article: How To Install Touchless Kitchen Faucet?
How to remove faucet aerator that is stuck?
If you have a stuck aerator, it is probably due to mineral deposits that built up in the area around the aerator over time. You will need to remove it to clean it and then reattach it correctly. Here are some ways to remove a stuck aerator:
Remove the faucet aerator using pliers
Using channel lock pliers you can unscrew the aerator by rotating counterclockwise. If you don’t have channel lock pliers then use regular pliers instead just make sure they are strong enough to hold securely on and won’t slip off. The advantage of pliers is that have a good grip beside your bare hands. Do not use excessive pressure on the faucet aerator, otherwise, you will break it. Also, make sure not to use any tool that has a sharp edge because it might scratch the faucet.
Also, an adjustable wrench will do the trick
If you don’t have any pliers at hand, you can use a crescent wrench or adjustable wrench instead. The trick here is to keep turning until you end up with the aerator loose from its mounting point on the faucet body. We highly recommend using masking tape, a cloth, or a rubber band to mask the aerator. In this way, you have a better grip and you won’t damage its finish.
How do you deal with a stubborn faucet aerator?
The most common is by using a wrench or pliers but there are also other methods that work.
WD-40
If you are dealing with a stubborn aerator, you can use WD-40. It is a lubricant that is good at getting things moving and it is safe to use on most surfaces. Solvents and lubricants such as WD-40 are excellent options. It is used to loosen gunk, sand, rust, and other materials. You’ll need to spray it on the part of the aerator that’s sticking and leave it for a few minutes before trying to remove it again. Work in small sections at a time so as not to damage any other parts of your faucet. If you have tried it for a while and still have problems, it might be time to try something else.
Vinegar
If you don’t have any lubricants such as WD-40 in your home you can use vinegar. It is known to have limescale and mineral build-up-removing properties. You can soak the faucet aerator in vinegar for a few hours and then use pliers or a wrench to remove it.
In a small bag, place some vinegar, and wrap it around the faucet aerator until it is completely submerged. The only thing you need to do is wait for mineral deposits to break down. Then you should be able to unscrew the aerator from the faucet spout.
Applying heat
Applying heat to the faucet’s aerator can loosen it. The heat will expand the metal and also brake the mineral deposits. A heat gun may be the best tool for the job, but if you don’t have one, then a hair dryer will also do the trick. This method should only be used on metal aerators. Heating a faucet with a plastic aerator can damage it!
Related Article: How To Troubleshoot Your Touchless Faucet: Here Is How To Fix It
How to remove aerator from pull down faucet?
This type of kitchen faucet is popular among many homeowners. You should know that all pull-down faucets have an aerator in the spray head. Either is screwed on the spray head or placed inside.The first step is to detach the spray head from the hose, which is done by unscrewing it from the stem of the faucet. Once you have removed it, you can remove any debris that may be stuck in its interior..You can use a toothpick or other pointed object to scrape them out and clean away any remaining residue from inside the nozzle assembly.
In more detail, let’s look at how you can remove and clean the aerator on three major brands of kitchen faucets:
How to remove aerator from Moen faucet?
If you’re having trouble with your Moen pull down kitchen faucet and it’s low pressure, you should clean the spray head. Here are the steps to follow:
- Pull down the spray head as far as the hose will allow. Tying the hose or using a clamp or something else may be necessary to block it from retracting into the faucet’s spout. Be careful not to damage or puncture the hose.
- Place a towel in your sink or cover the drain. In this way, you won’t lose essential parts when you dissemble the spray head.
- Using pliers hold the end of the hose firmly and with the other hand turn counterclockwise the spray head.
- Once removed you’ll find the screen washer inside the top part of your spray wand.
- Hold the screen washer under the stream of your faucet’s hose and wipe away any debris. If there are any remaining residues, you may want to use some pointing tools to remove them.
- All the pieces should be clean and ready to assemble. After tightening the spray wand on the hose using the pliers, you should be able to blast water at full pressure.
How to remove aerator from Delta faucet?
It’s easy to clean the Delta pull-down faucet spray head by removing the aerator. The most difficult part is to remove it from the hose and to make sure that you don’t lose any parts while doing so. Here are a few steps that will help you:
- First, you should detach the spray head. To do this you’ll have to unscrew it from the faucet. When pulling down the hose you will notice a little retainer clip. Pushing it down and turning counterclockwise will remove the spray head from the hose.
- Secure the hose otherwise will retract in the faucet. The simplest way is to make a tie around it.
- On the hose, there is a little O-ring. Make sure you won’t lose it. At this point, you can turn on the water. If the pressure is normal it means that spray head filters need some cleaning.
- Inside the spray head, you will see a little screen filter. Gently pull it up and you will notice that mineral build and debris are caught there. Use a soft-bristled brush, such as a toothbrush, to remove any mineral deposits from the screen filter.
- Put all the pieces together. Once the spray head is attached to the hose, it is time to test the water flow.
If you have a Delta Touch2O kitchen faucet, there is also a little screen filter inside the electronic control box. You will see a small filter inside the solenoid valve inlet. The screen filter is easy to remove with needle nose pliers or tweezers. There is no need for special tools or expertise when removing this filter because it is just a piece of plastic.
How to remove aerator from Kohler faucet?
On most Kohler pull down kitchen faucets the aerator is screwed on top of the spray head. If you’re having trouble getting your aerator to work properly, there are some steps you can follow to fix it.
- Pull the spray head toward you. You will notice a screen net on the spray face.
- An adjustable wrench can be used to turn the spray face aerator counterclockwise. It is important to align the wrench with the aerator’s flats.
- Under a water stream, you can clean the screen filter with a brush. You can also soak it in vinegar for a few hours if debris and residue remain.
- Using the same wrench, mount the aerator on the spray face after cleaning
There are some models that have a screen filter within the spray head. If you want to clean it, you should detach the spray head from the faucet’s hose.
Related Article: Best Kohler Touchless Kitchen Faucet
How to remove recessed faucet aerator?
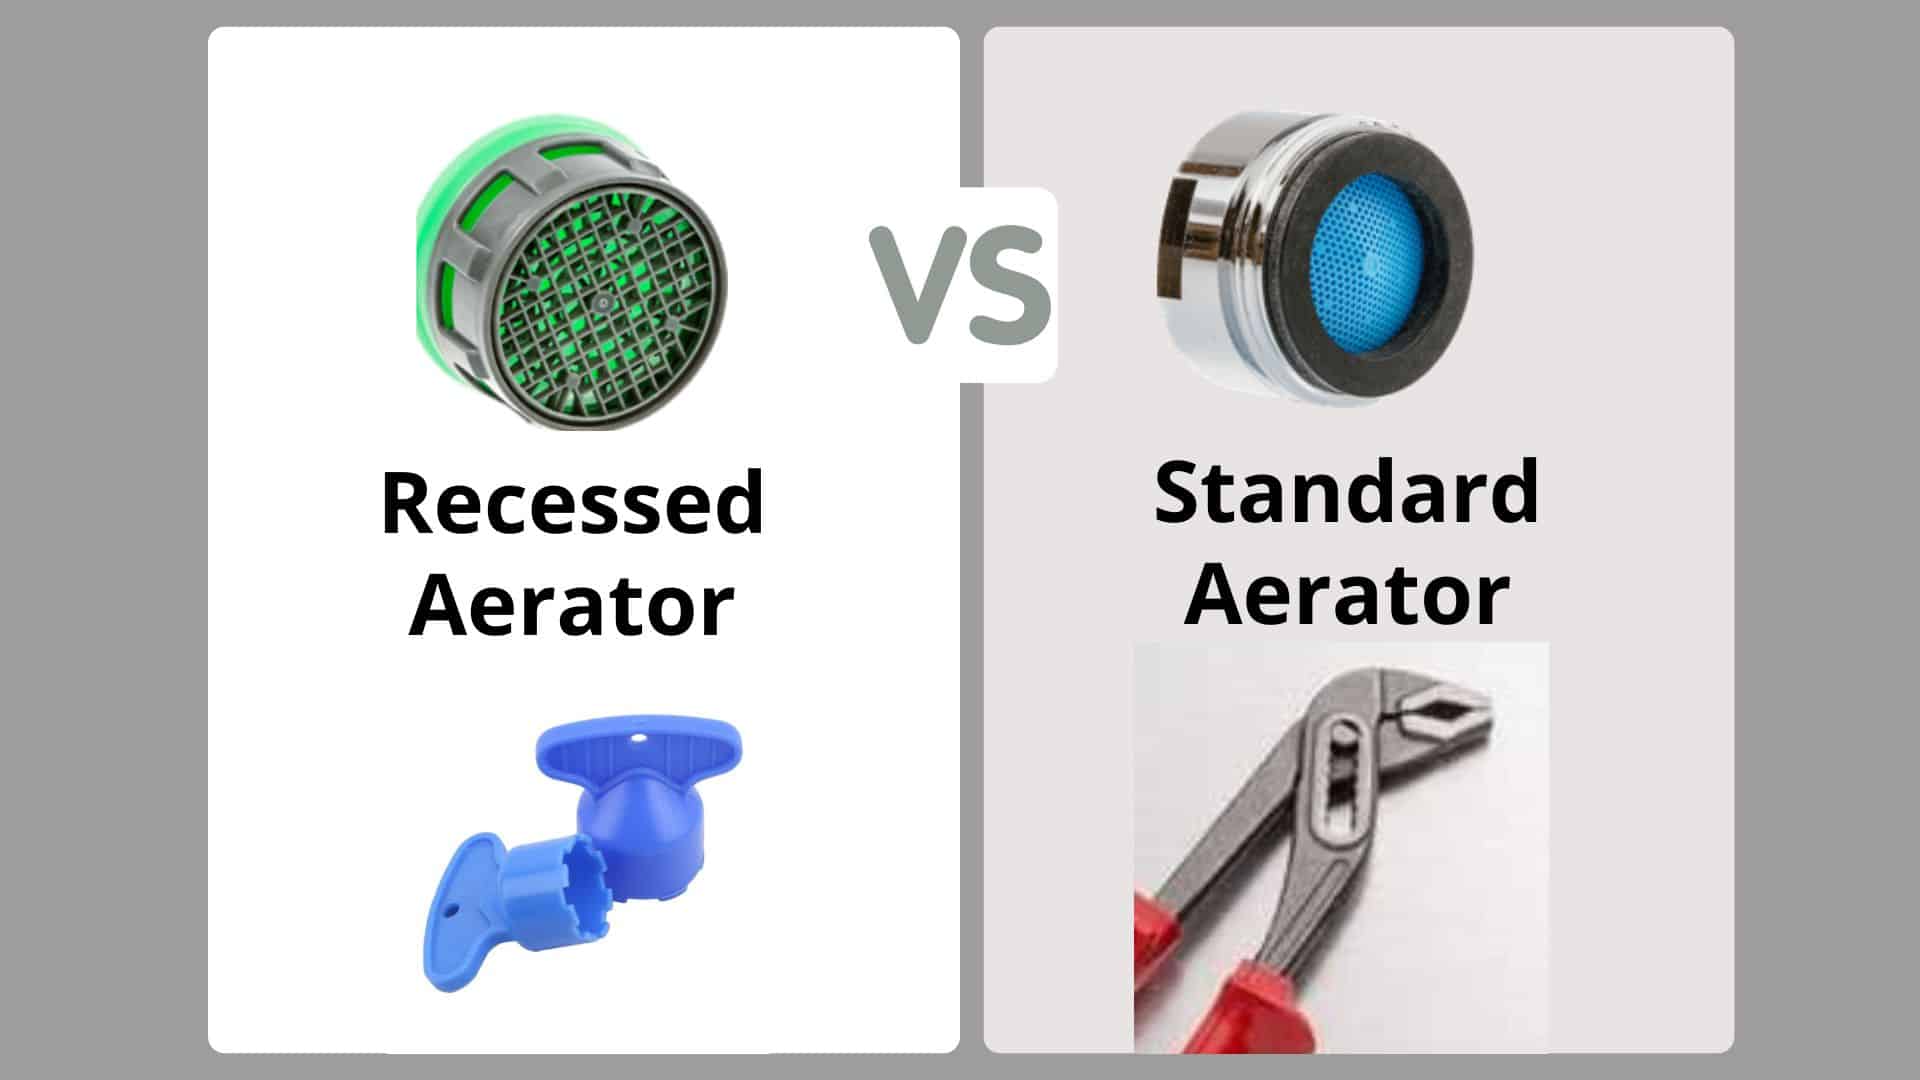
Ideally, you should know the difference between a recessed aerator and a standard one before you figure out how to remove it.
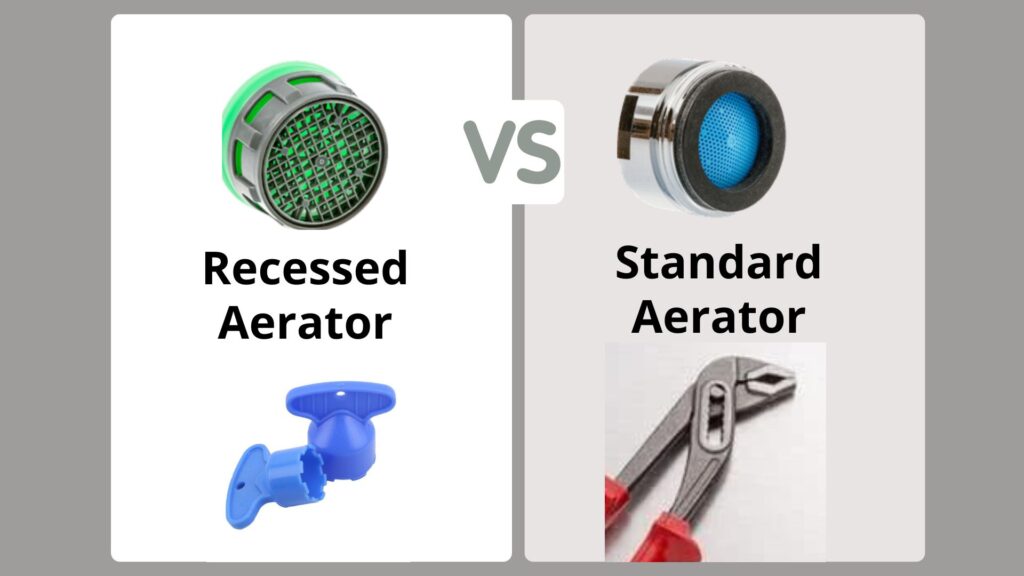
Recessed Aerator
Recessed aerators are available for both kitchen and bathroom faucets. These are designed to be hidden from prying eyes. They are also called hidden or cache aerators. These were firstly made with vandal-proof design in mind. Then were used in many modern faucets because they directly thread in the faucet’s spout. In most cases you need a special key to remove a recessed faucet aerator.
Standard Aerator
Standard aerators are a great option for kitchen and bathroom faucets. They have a standard threading that fits in most standard faucet spouts. The main advantage of these aerators is that they are very easy to install and remove. You don’t need any special tool or key to remove them. Just simply turn off the water, unscrew the old one, and replace it with a new one.
An aerator key can be used to remove it easily
To remove a recessed faucet aerator you will need a special key that came with the faucet. Each manufacturer installs different aerators in their faucets, so there are several types of keys to remove them. The good news is that you can find online various sets of recessed aerators with keys that are extremely cheap and worth replacing.
How to remove recessed faucet aerator without key?
Removing a recessed faucet aerator can be a tricky job without a special removal key. We will guide you through some effective ways to remove it:
Using your hands
You can remove a recessed faucet aerator with your bare hands. Especially if your faucet is relatively new and mineral deposits didn’t build up. You can grip with your fingers the aerator and turn it counterclockwise. You can use rubber gloves or cloth for a better grip.
Using a flat screwdriver
If you don’t have access to any other tools, then using a flat screwdriver will be the easiest way for you to remove the faucet aerator on your own. You just need to place the tip of your screwdriver against the hole where your aerator goes in, and then turn it counterclockwise until it comes to lose.
Using needle nose pliers
These are great at gripping things tightly and securely, which makes them perfect for removing recessed faucet aerators without keys! You can also find other similar tools like tweezers, Q-tips, and toothpicks at most hardware stores or online.Simply place them on the edge of the metal ring between the ridges. Turn counterclockwise until you loosen the faucet’s aerator.
Related Article: Best Touchless Kitchen Faucet with Soap Dispenser
Conclusion
As you can see removing the faucet aerator can be done by anyone. The only thing that you need to have is a little bit of passion and the right knowledge of how to do it. Now that you know how to remove the aerator, you might be wondering whether it is worth it. We think that it is, as the aerator is most often the reason for low pressure in faucets. Thanks for reading our guide and we hope that you found it useful!